Adding firewall rules in bulk to Plesk is not that easy, but it is possible
I recently changed my CDN provider because they were constantly making changes to the CORS settings, which caused websites to be down all the time. The support didn’t have a clue how to solve it and constantly referred to help articles that didn’t solve the problem.
So I looked at what else is on the market and came across bunny.net. They made a good impression from the price-performance ratio and so I tried it on a test domain.
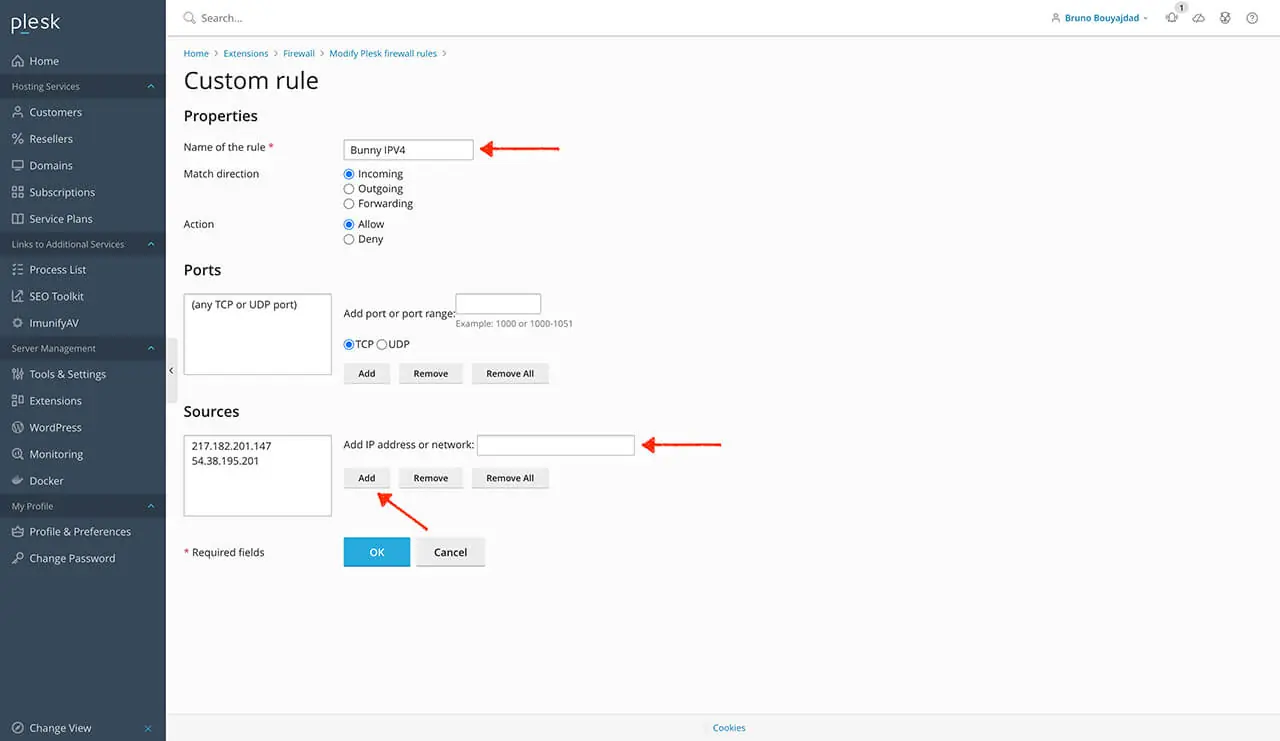
It worked then but only after several minutes properly and there was the question where it came from. Images and scripts were only partially loaded. It turned out that the IP’s of bunny.net were blocked by the firewall rules in Plesk during the firstload from the pullzones, because they build massive connections during the firstload.
To avoid this, all IP’s from bunny.net, i.e. IPV4 and IPV6, must be entered into the whitelist. Here is the list for IPV4 and here for IPV6. And there we have a big disadvantage with Plesk. It only works one by one. But since something like this can happen again and again, it was a matter of finding another way.
Prepare Plesk and find out the structure of the rules
:~# plesk db
↵ (Enter)
Shows:
Type 'help;' or '\h' for help. Type '\c' to clear the current input statement.

MariaDB [psa]>
Now we need to know our table:
MariaDB [psa]> show tables;
↵ (Enter)
Will give you an overview. We need the table “module_firewall_rules”:
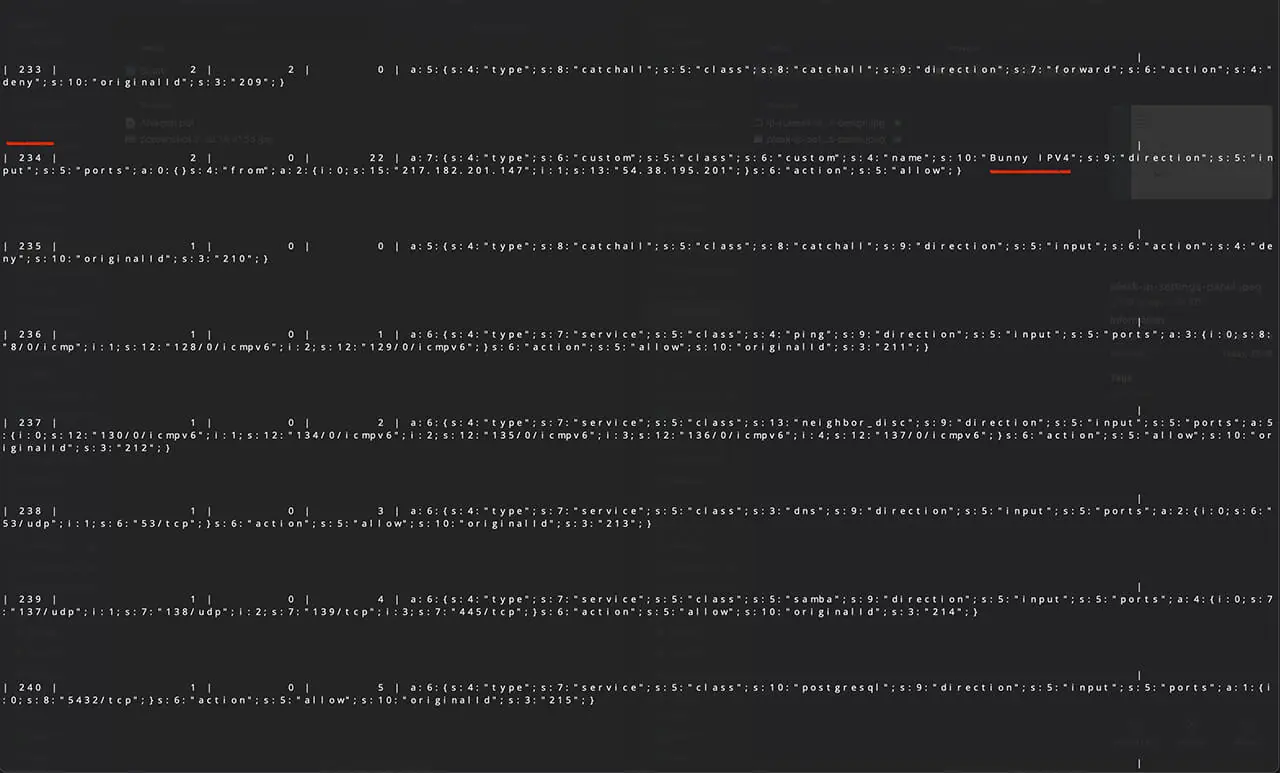
MariaDB [psa]> select * from module_firewall_rules;
↵ (Enter)
You should now see something like in the picture above. The number in front between the two pipes “|” is the ID, in this case 234, followed by the corresponding ruleset.
a:7:{s:4:"type";s:6:"custom";s:5:"class";s:6:"custom";s:4:"name";s:10:"Bunny IPV4";s:9:"direction";s:5:"input";s:5:"ports";a:0:{}s:4:"from";a:2:{i:0;s:15:"217.182.201.147";i:1;s:13:"54.38.195.201";}s:6:"action";s:5:"allow";}
We now need to split the ruleset into the area before the required IP rules and the area after.
Before:
a:7:{s:4:"type";s:6:"custom";s:5:"class";s:6:"custom";s:4:"name";s:10:"Bunny IPV4";s:9:"direction";s:5:"input";s:5:"ports";a:0:{}s:4:"from";a:2:{
At the end of the before part, we see “a:2:{“. We may remember that as well. Because here it is about the number of IP’s. Since we have 2 so far it is set to 2 here – so no 0 index, because the count starts at 1.
Our part that it is mainly about:
i:0;s:15:"217.182.201.147";i:1;s:13:"54.38.195.201";
After:
}s:6:"action";s:5:"allow";}
Here a stands for array, i for index and s for string. Our part that we need with the two IP rules has index 0 (not 1) with a string length of 15 and index 1 with a string length of 13. With that in mind, we need the following structure for each entry:
i:{id};s:{stringlength}:"{IP}";
This seems like a good use case for a custom PHP script, or an Excel spreadsheet, though Excel is easier to deal with. So Excel.
Housten, we have a problem –> No backup yet
Nothing simpler than that. To do this, we enter the following in the terminal:
plesk db dump {database_name} > /path/to/{dump_name}.sql
In our case:
plesk db dump module_firewall_rules > /var/www/vhosts/psa_dump.sql
To store it back in:
plesk db < /path/to/{dump_name}.sql
In our case:
plesk db < /var/www/vhosts/psa_dump.sql
Prepare the IP lists
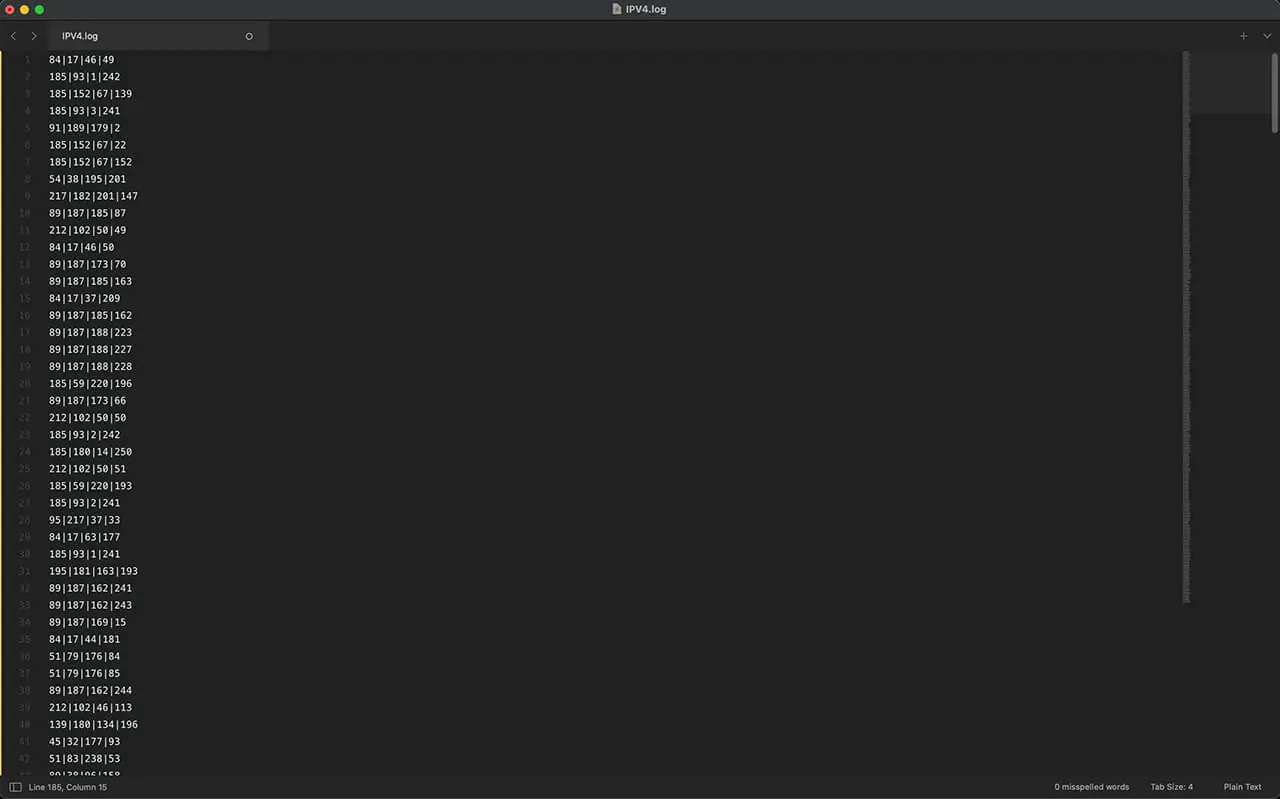
Replace the dots at IPV4 with pipes “|”, otherwise some IP’s are recognized in Excel as numbers instead of strings. Then it does not work, because the functions are not executed cleanly.
Also make sure that there are no spaces. Only the IP per line.
Here you have my cleaned lists for bunny.net, but check them for completeness, because new servers are added all the time. Here is IPV4 and IPV6.
Bring it to Excel
Now open an Excel spreadsheet and select the field A1. Paste the IP’s into the table.
Now click into the B1 field and enter the following:
=LEN()
And go back between the brackets with the cursor. The mouse pointer changes to a cross. With it you click in A1 and press Enter. Depending on which IP you have in A1, a number with the length of the characters of A1 appears in B2.
Now mark B1 again and grab with the mouse the green square at the bottom right border of B1. Drag it downwards over all fields of column B. Now the length values in column B should appear everywhere in addition to the IP’s in column A.
=C1+1
Mark C2 and drag the small green square down again. Here we now have enumerated ID’s that we can use later for the index. As mentioned above, we have to start at 0 for the indices.
=CONCAT("i:"&C1&";"&"s:"&B1&":"&""""&A1&""";")
Mark D1 and drag the small green square down again. Now we have the strings as we need them for the IP’s in the Plesk database.
This is important, otherwise the transfer will not work. Copy this with “Command+C” on the Mac and “Control+C” on Windows.
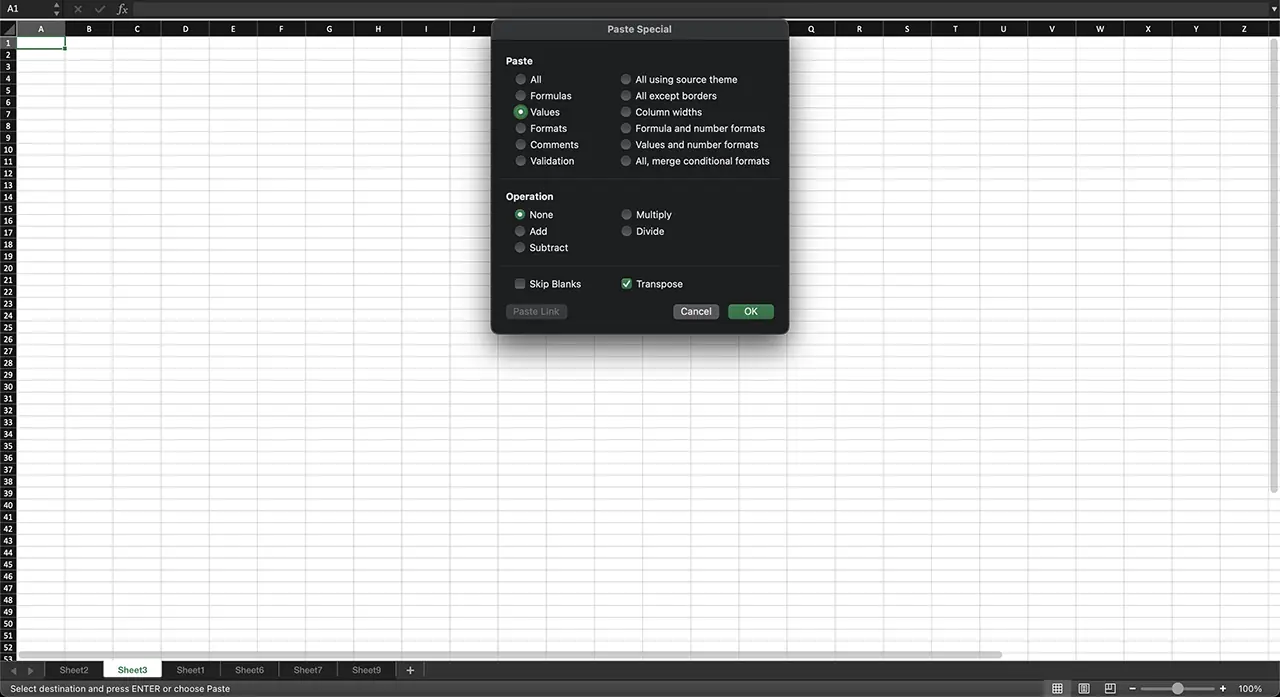
Open a new sheet and click on A1 again. Then the combination “Option+Command+V” on the Mac and “Option+Control+V” (I think, not sure) on Windows.
A window will open. Here you select “Values” and click the check mark at “Transpose”.
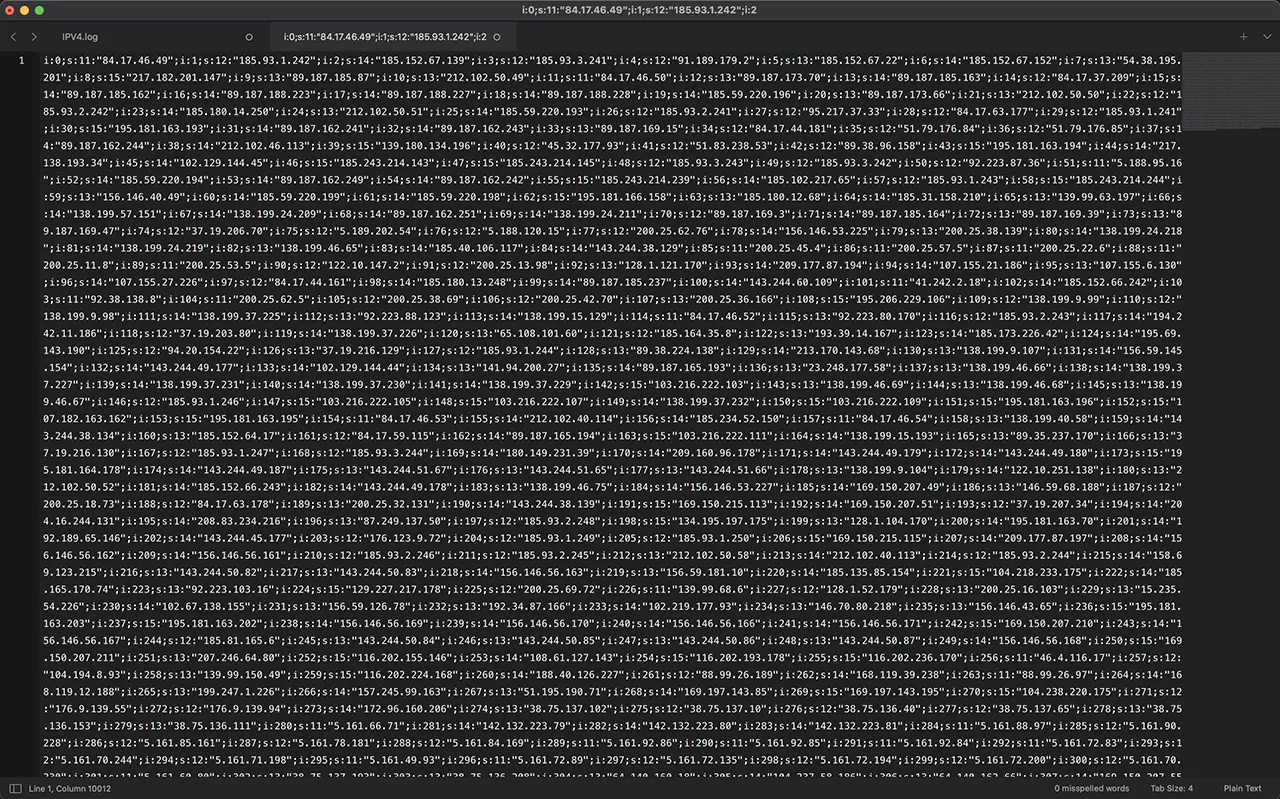
i:371;s:14:"212.102.46.115";
That would certainly not have been fun to enter individually.
Means, since the index has a 0 index, that we have a total of 372 IP’s.
Back to the before part. Here we change the range at the end from “a:2:{” to “a:372:{“.
a:7:{s:4:"type";s:6:"custom";s:5:"class";s:6:"custom";s:4:"name";s:10:"Bunny IPV4";s:9:"direction";s:5:"input";s:5:"ports";a:0:{}s:4:"from";a:372:{Now we put the changed before part in front of the finished string we fetched from Excel and the upper after part unchanged behind it. Let’s call it “theWholeObject”.
From this we can now build the query to include it in the Plesk database.
update DATABASE_NAME set object='theWholeObject' where id=ID;
The ID in that case was 234.
Both the ID and the IP index can and probably will be different for you. So replace it accordingly as indicated above, otherwise it will not work.
update module_firewall_rules set object='theWholeObject' where id=234;
Now put “theWholeObject” into the query and back to the terminal and the database. Paste the query there and confirm it. You should then see a very large new entry:
Now, however, the whole thing still has to be confirmed in Plesk. And there, at least for me, a small workaround was necessary, which I found out rather by accident.
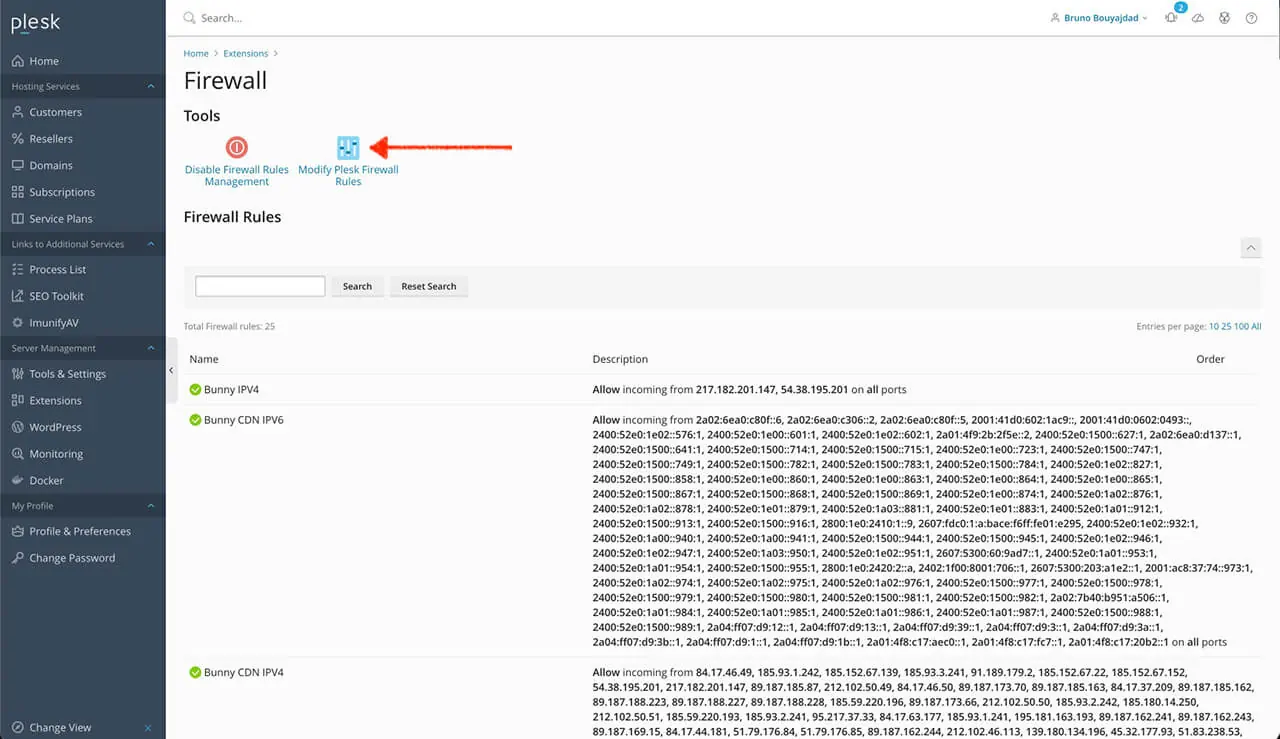
First, click “Modify Rules”:
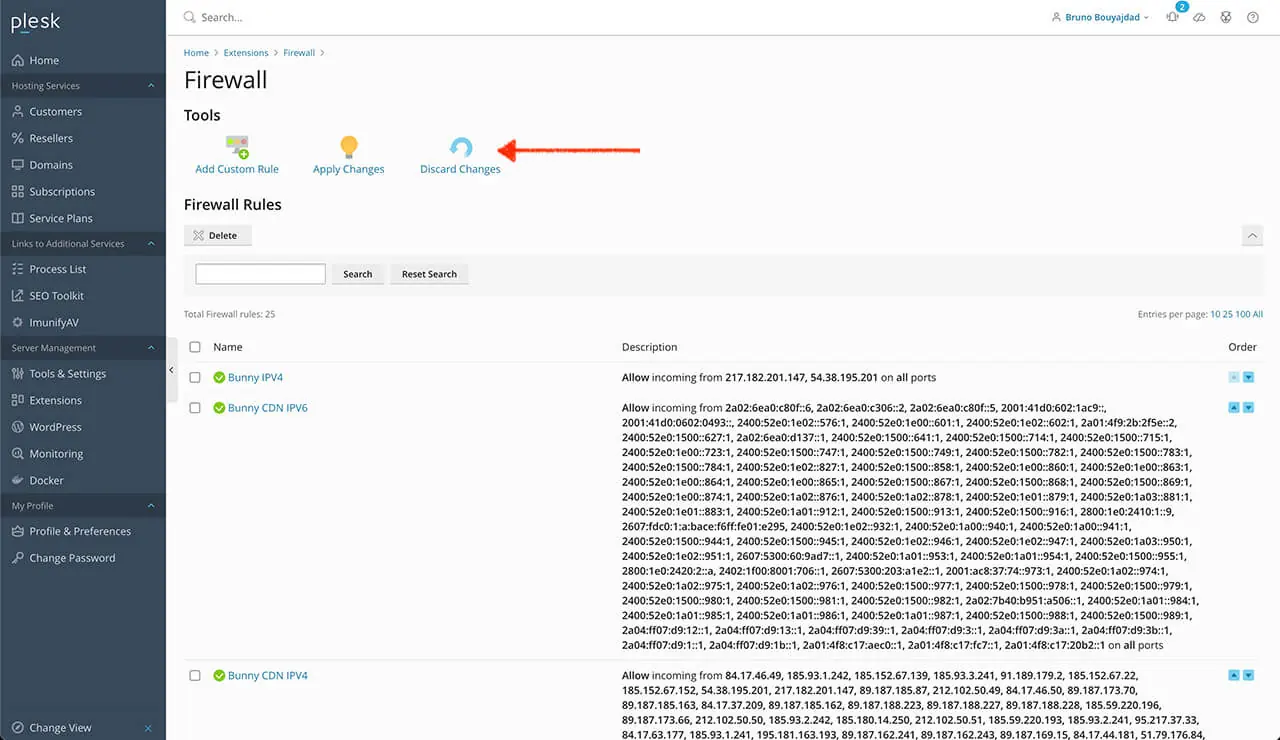
Only when I clicked “Discard Changes” and then tried again with “Apply Changes”, it worked.
The whole thing now again for the IPV6 rules, or whatever rules you want to add and good luck with it!
Final words about inserting many firewall rules at the same time in Plesk
When you do it for the first time, it seems a bit complicated. However, by the 2nd time at the latest, it becomes much easier to do. And it is in any case better than making 400 entries or more by yourself. So give it a try and be surprised how easy it is in the end.
Have you suggestions for improvements to this article? Just use the comment area below. Do you want support for implementation or do you need help elsewhere? You can book us. For this, simply use our contact form to get in touch with us.
Divi is a registered trademark of Elegant Themes, Inc. This website is not affiliated with nor endorsed by Elegant Themes.
Get the best out of your web!






[…] want to know how to share the IP’s of “bunny.net” in Plesk, read my blog “Adding firewall rules in Plesk in bulk“. You have to do this so they don’t get blacklisted in Plesk the first time they pull […]