Move WordPress safely and without loss of data
Each of which deals with WordPress, will eventually come to the point at which the own WordPress page changes the domain and whether it is only the change of the test domain to the actual WordPress live domain or the change of the protocol “http” to “https”. But what if something goes wrong and perhaps even data during move WordPress lost? Would you like to avoid? Then this article is for you.
What to do for move WordPress?
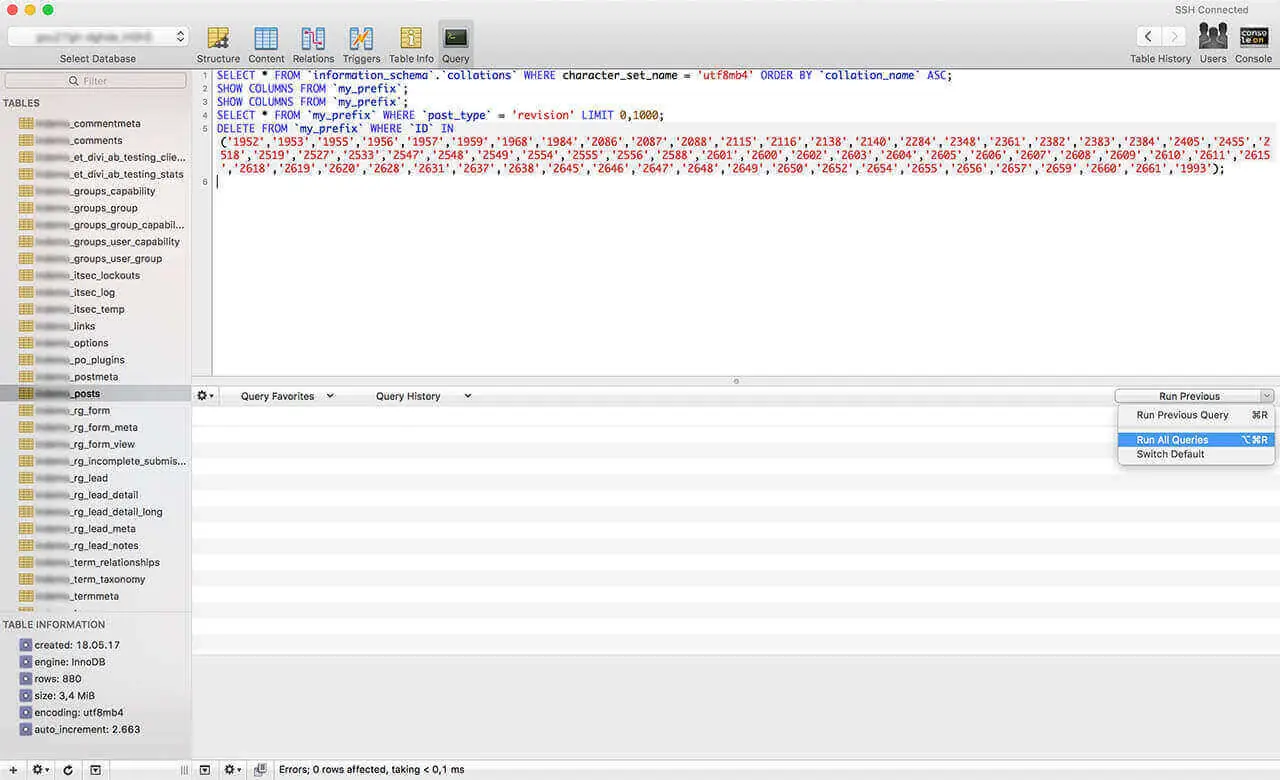
When you move WordPress, it is important to ensure that the links to the used media resources in the database and if necessary in the WordPress file-system to be adjusted. For the adjustments in the database, you can use for example tools such as Sequel Pro, Workbench or phpMyAdmin. But then it is of advantage if you are also familiar with MySQL commands and knows how to use these tools on the console to ensure move WordPress safely.
When you are in this area not safe enough you risk data loss while you move WordPress because already minimal errors in the database can have a devastating impact. If you do not know how to correct these mistakes, your WordPress website will be unavailable on the new domain until you fix the errors, or you find someone to solve this task for you. However, you can avoid this anger if you keep some of the following tips.
Please note that here is explained how to move WordPress using a MySQL database can be made. The use of this information is done at your own risk. Liability for loss of data is not available. You should have basic experience working with WordPress and WordPress databases. Otherwise, it is recommended to pass it on to someone who is familiar with it. If required we will be happy to help you. Take it easy to get in contact with us.
Preparation for move WordPress
Before you begin with move WordPress, you should always create a backup. In this case of your WordPress file-system and from your database. An excellent tool for this is BackUpWordpress. It is straightforward to configure and then performs its work reliably. In our case, however, we use it to extract all the data needed for the move.
This plugin is just a personal recommendation. You can also use any other tool, which is capable of extracting the entire file system and the database for move WordPress. Such a plugin should also not be installed additionally but should be used in every WordPress environment by default to create regular backups.
The plugin mentioned above can be installed via the official WordPress directory. After activation, open the corresponding settings and select the menu item “Complete-Weekly”. If there is any data that you do not want to export for move WordPress, you can exclude these from the backup. Then click on “Run Now”. After that, it takes a few minutes for the new backup to appear directly below the settings tabs. Now click in the corresponding row the “Download” button at the right. Afterward, you will find the backup as a zip file in your download directory.
After the download is before the upload
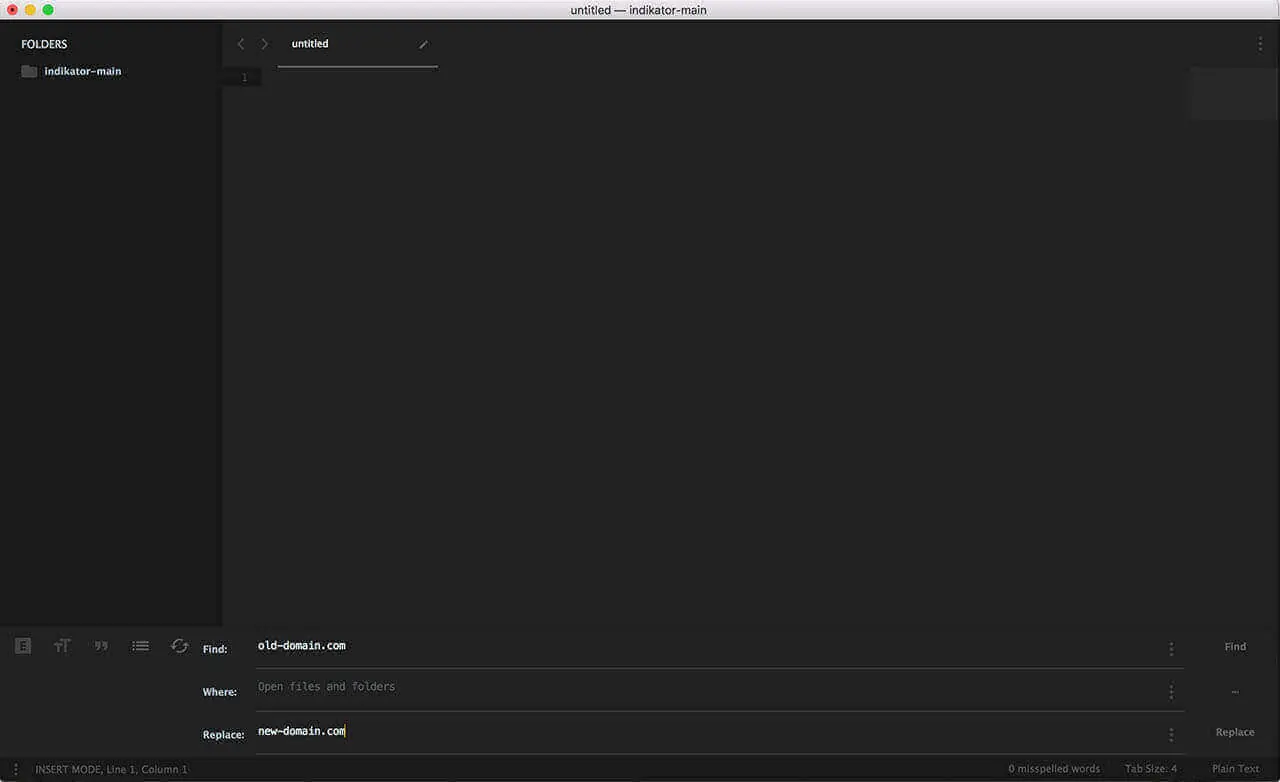
No matter how you have gained the data, you should now have the full file system and a separate SQL-file. Now use a code editor like Sublime Text, Atom or Brackets to manually change your links from the old domain to the new domain in your directory by using “Search and Replace”. In Sublime Text, this can be quickly started with the command “Shift + CMD + F” on the Mac and “Shift + Strg + F” under Windows.
Customize the links in the file structure
Here is an example of a simple change from a test domain to the live domain.
Search: test.domain.com
Replace: domain.com
As far as changing from “http” to “https” is concerned, two steps are necessary to ensure the complete change.
Step 1:
Search: http://test.domain.com
Replace: https://domain.com
Step 2:
Search: test.domain.com
Replace: domain.com
Adjust the “wp-config.php”
Now open the file “wp-config.php”. First, update the information for the database and carry the following two lines with your URL:
define('WP_HOME', 'http://domain.com');
define('WP_SITEURL', 'http://domain.com');
Usually, takes one of these settings in WordPress-Menu under “Settings > General”. This is no longer necessary for the entry of these two lines since you have already defined the domains with this step. Future changes you can then only make here since the entries in the preferences in the WordPress backend can no longer be modified.
The upload of the file directory
In so far as you have an SSH access, you can now compress the file system without the SQL file into a zip archive and move it to the root directory of your domain via SFTP / FTP. This should work quite quickly. An FTP client such as Transmit or FileZilla is suitable for this purpose.
Unzip the file directory
Then you can use a terminal emulator like iTerm2 (Mac), ConsoleZ (Windows) or the default console of your OS to access the folder via SSH and extract the directory using “unzip MyPackageName.zip”. This will create a folder in which you will find all of your files. The easiest way to move these files to the root directory is via your FTP client. Then you simply can delete the empty folder.
Set permissions
For security reasons, adjust the file permissions now. These settings are sufficient during installation but should be further modified later as described in the Changing Files Permissions article. On Ubuntu, you can use the following commands. I will assume that your root directory is under “public_html”. The first command is for your folders, the second for your files:
find public_html/ -type d -exec chmod 755 {} ";"
find public_html/ -type f -exec chmod 644 {} ";"
In principle the following structure is recommended:
MyDomain/public_html/RootDirectory*
If you keep that, you can now move your “wp-config.php” from the root directory and drop it one level higher so that it is one the same level as your “public_html” folder. This is an additional safety factor. WordPress detects this automatically. At file level, now everything is done for move WordPress.
Import the database
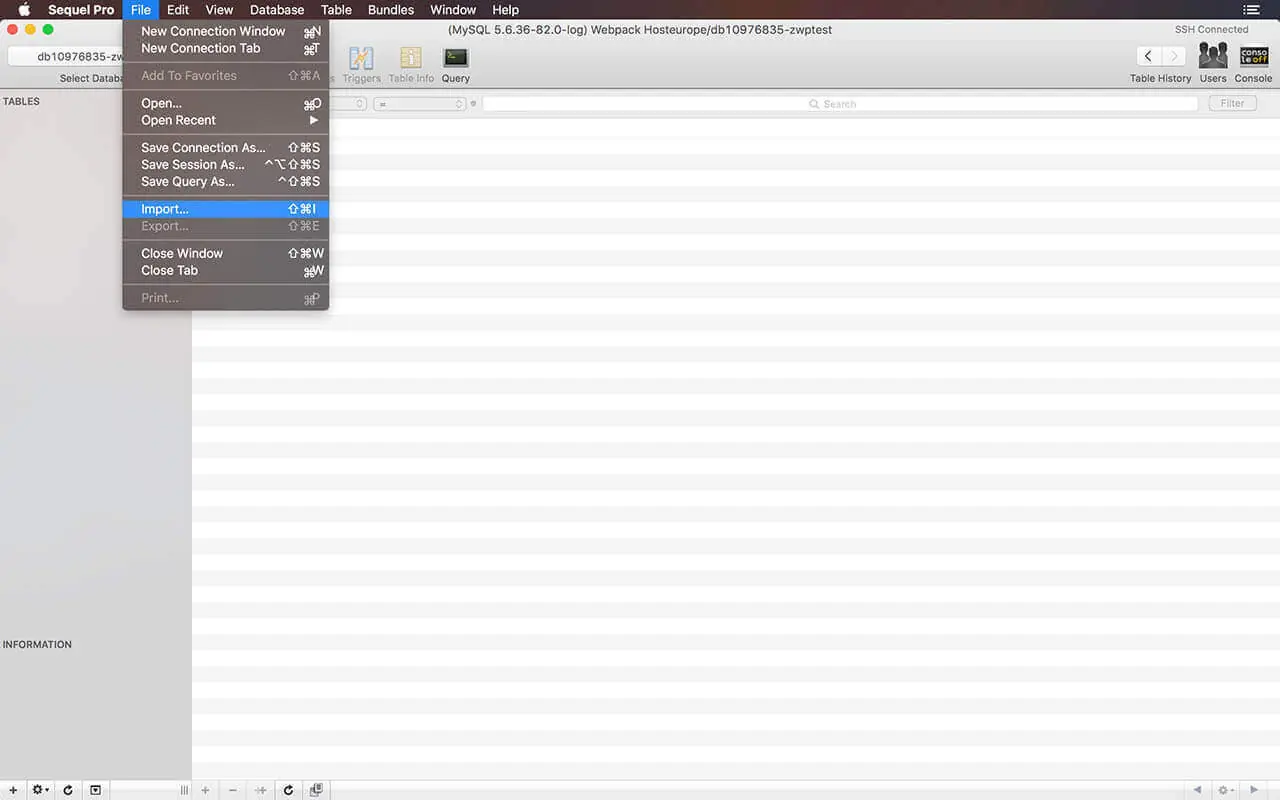
Now you can use one of the tools mentioned above to import the database file. Go to “Import” and select the file with the extension “.sql” from your hard drive to import your database information for move WordPress.
If the SQL file exceeds a certain size, it can lead to crashes, if you use “phpMyAdmin”. This has to do with the duration of a PHP script can perform. “PhpMyAdmin” itself is a PHP script and is also subject to these restrictions. Either you increase this length in the “ini.php” or you temporarily add the following statement in your wp-config.php”:
ini_set('max_execution_time', 300);However, it depends on your server whether this statement is executed or not.
Do you use on the other hand “Sequel Pro” or “Workbench”, you can import files of any size without aborting the import, as they are not subject to PHP limitations. It is, therefore, a clear recommendation to use one of these programs.
Customize the links in the database
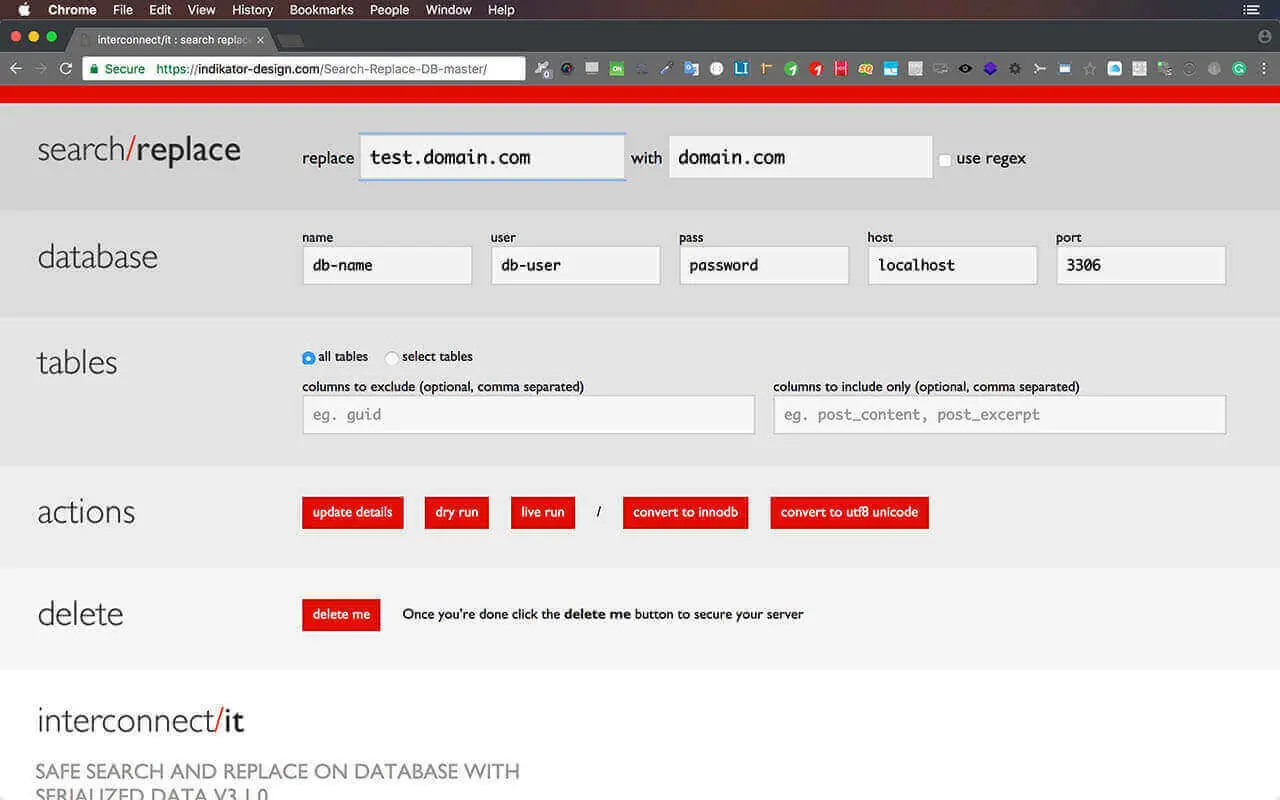
Now you can download the script Search and Replace from “interconnect/it”. Unpack it and load the directory to your WordPress root directory.
Now open in your browser your domain with the suffix “/Search-Replace-DB-master”, i.e. “https://domain.com/Search-Replace-DB-master”. Here you should typically find the fields pre-filled with the data of your WordPress database. If this is not the case, you simply have to copy them from your “wp-config.php”.
In the “replace” field, enter the data of the WordPress test domain “test.domain.com” and in the field “with” the data of the new Livedomain “domain.com” and click on the button “dry run”. The replacement for move WordPress is initially simulated, without actually changing any data. You can now preview the upcoming changes carefully.
If all appear as expected, you can now click on the “live run” button to actually make the changes. Note that it is a serialized data replace. This means that not only the relevant strings in the WordPress Database changed but also the previously stored data of strings and arrays.
If the protocol also changes from “http” to “https”, then also note here the second run described above and used for the file system. It is then important to ensure that this tool is in any case being deleted (!!!). Normally it is enough just to hit the button “Delete Me” for that. In any case, make sure that the script has actually been removed. If it remains on the server, it represents an immense security risk.
Additional settings for changing to “https”
If you change the protocol from “http” to “https”, some additional settings are necessary. First, you should insert the following statement in your “wp-config.php”. This forces SSL in the WordPress backend.
define('FORCE_SSL_ADMIN', true);Then the following addition is important in your “.htaccess file” (Apache) to secure SSL also in the frontend. Change “domain.com” to your domain name.
<IfModule mod_rewrite.c>
RewriteEngine On

RewriteCond %{HTTPS} !=on
RewriteRule ^ https://%{HTTP_HOST}%{REQUEST_URI} [L,R=301]

RewriteCond %{SERVER_PORT} !=443
RewriteRule ^(.*)$ https://domain.com/$1 [R=301,L]

</IfModule>
Here is a bonus, if you want to redirect all “www.domain.com” requests to “https://domain.com”. This statement also comes in your “.htaccess file”.
<IfModule mod_rewrite.c>
RewriteEngine On

RewriteCond %{HTTP_HOST} ^www\.(.+)$ [NC]
RewriteRule ^ https://%1%{REQUEST_URI} [R=301,L]

</IfModule>
Final words for move WordPress
Your move WordPress should be completed now. However, test all your WordPress pages on their proper functionality.
Have you suggestions for improvements to this article? Just use the comment area below. Do you want support for implementation or do you need help elsewhere? You can book us. For this, simply use our contact form to get in touch with us.
Get the best out of your web!


